Introduction
Welcome
In this guide, you will create the side pods and wheel housings.
Fusion 360
This document may be used in conjunction with the .avi library available to you.
Video Overview
-
-
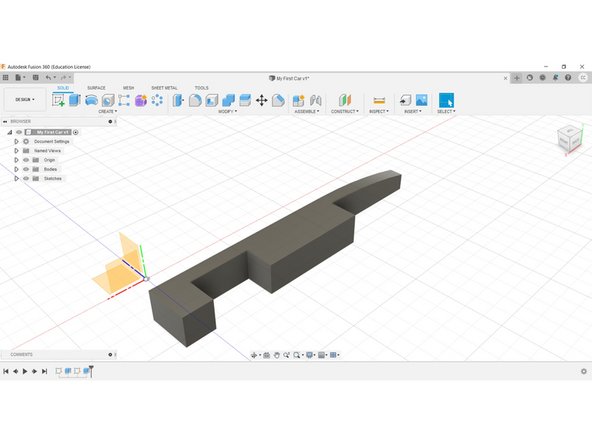
Welcome. You should now have a 3D model like the one shown.
-
To create the Side Pods, and Wheel Housings, we need to complete some geometry on the Top of our model – the Planar Surface, not the origin.
-
-
-
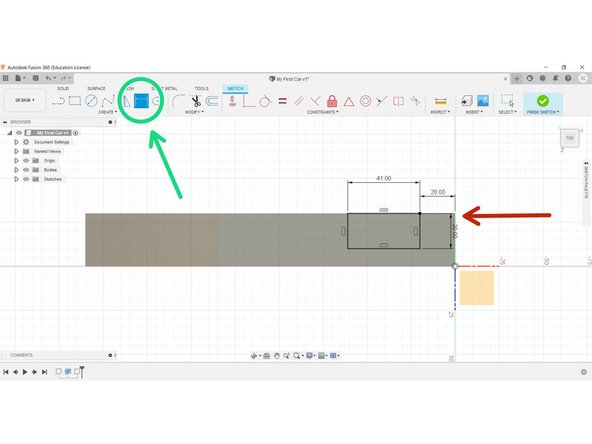
Start a New Sketch, and select the top of your model (the Planar Surface).
-
Select the rectangle tool, and create a rectangular shape, 41mm on the Z-axis, 20mm on the Y-axis.
-
Notice that your model has been rotated, this is normal.
-
If your model is rotated differently to the picture, use the Navigation Cube in the top right corner to re-orient it.
-
-
-
Select Sketch Dimension in the top ribbon.
-
Select the origin end and the closest line to the origin, and set this distance to 20mm, as per the diagrams.
-
-
-
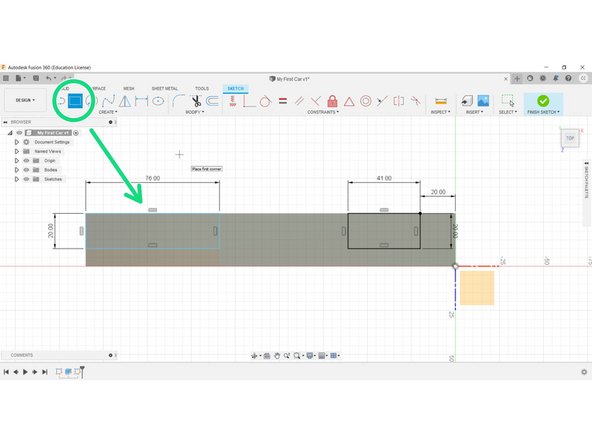
Create another rectangle, this time from the left-hand end of your model, with sizes 76mm on the Z-axis and 20mm on the Y-axis
-
Once completed, you may now click Finish Sketch.
-
-
-
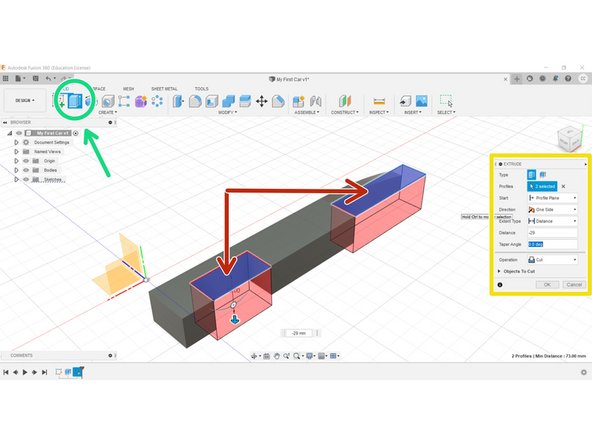
Select Extrude from the Create menu.
-
Hold the Shift key down while selecting both rectangles.
-
Make certain that Cut is selected in the dialogue box, as per the image.
-
This will be illustrated by the red zones that appear.
-
Select OK and Extrude to a depth of -29mm.
-
-
-
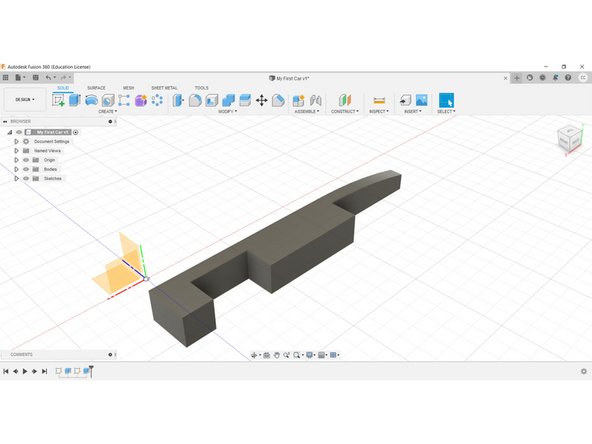
Congratulations, you have now completed the Side Pods and Wheel Housings.
-


