Introduction
Welcome
In this guide, we will cover the creation of the Rear Wing.
Fusion 360
This document may be used in conjunction with the .avi library available to you.
Video Overview
-
-
Create a New Sketch on the inside face.
-
-
-
Place a 20mm wide, 8mm tall rectangle on the rear of the canister housing.
-
The starting point of the rectangle should be placed on the inside corner of the chamber.
-
Click Finish Sketch.
-
-
-
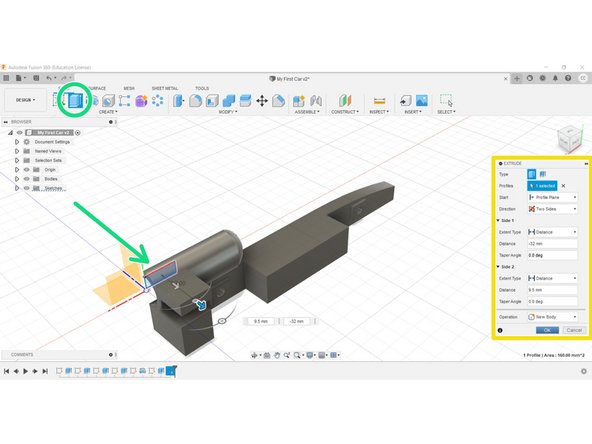
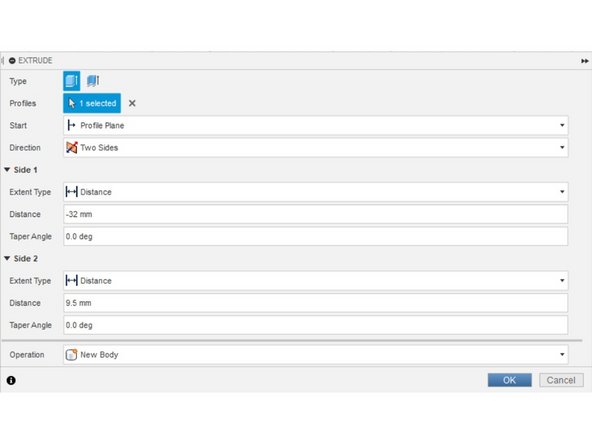
Using the Extrude tool, select the rear wing sketch geometry.
-
Apply the settings listed in the Extrude Panel. See second image.
-
Select the Two Sides option, which allows us to modify the original shape from both ‘ends’.
-
We created the Rear Wing at -32mm on the Z, (Side One), and then reduced the final length (Side two) by 9.5mm at the origin end.
-
Note: The 9.5mm adjustment is cosmetic, i.e. no geometry would actually exist inside the Canister Housing.
-
-
-
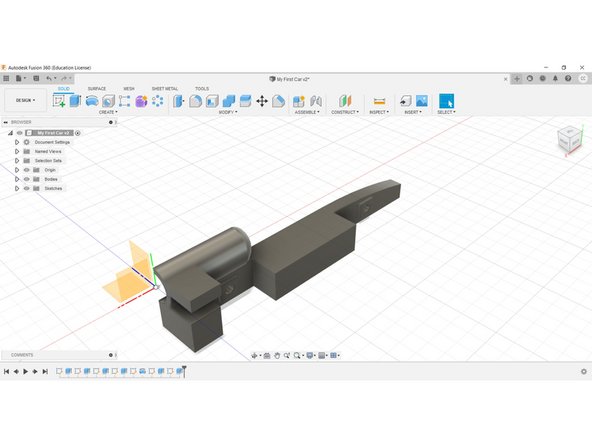
Congratulations, you have completed this section.
-