-
-
Download the REA Standard Car Parts from F1 in Schools / Competition Resources / REA Standard Car Parts.
-
Extract the files from the .zip file.
-
-
-
Open your My First Car folder in Fusion 360.
-
Click the Upload button at the top left of the screen, followed by Select Files.
-
Open the folder you have downloaded and extracted.
-
Select the five .ipt files; only select the Narrow wheel type, and click Open.
-
Note: These files may also show as Autodesk Inventor File.
-
Click Upload.
-
-
-
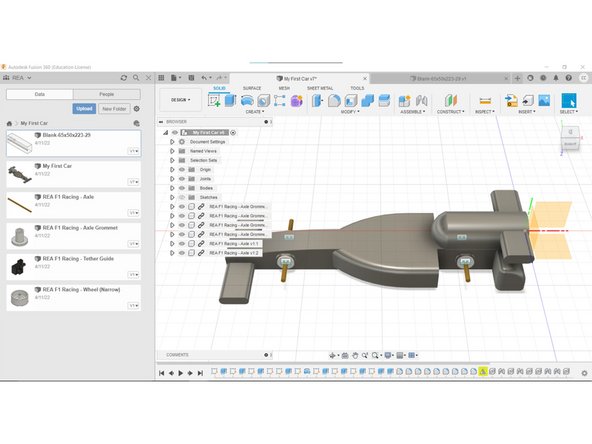
Click and drag one Axle Grommet into the My First Car File.
-
-
-
Select the Joint Tool in the Assemble Menu.
-
Select the inner face of the Axle Grommet, as shown in the image.
-
Next, select the inner ring of the Axle Support / Hole.
-
Watch as the joint is created; Click OK.
-
Repeat for the front-right axle.
-
-
-
Rotate the car body 180* using the Navigation Cube.
-
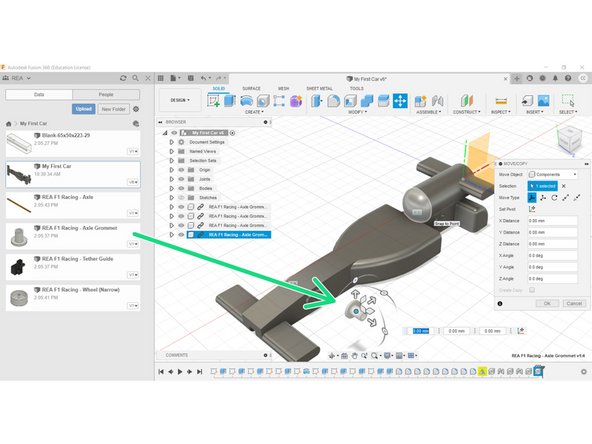
Insert an Axle Grommet into the assembly.
-
Note how the Axle Grommet is facing the wrong way to insert into the car body.
-
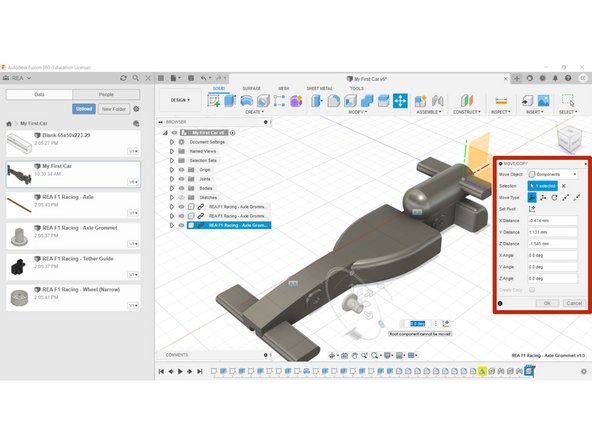
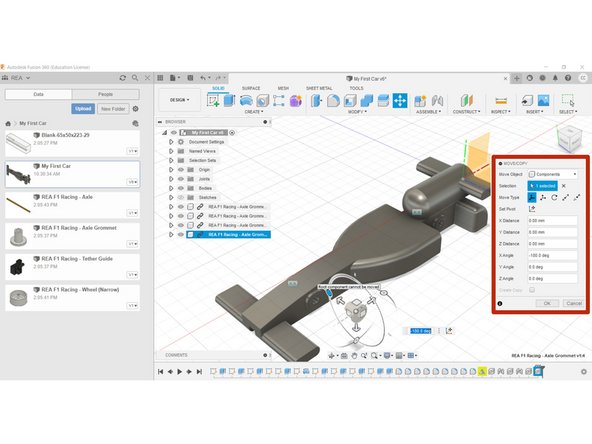
Rotate the X Angle through 180 degrees in the Move/Copy Operation Panel.
-
Check this has correctly rotated the Axle Grommet for assembly and click OK.
-
-
-
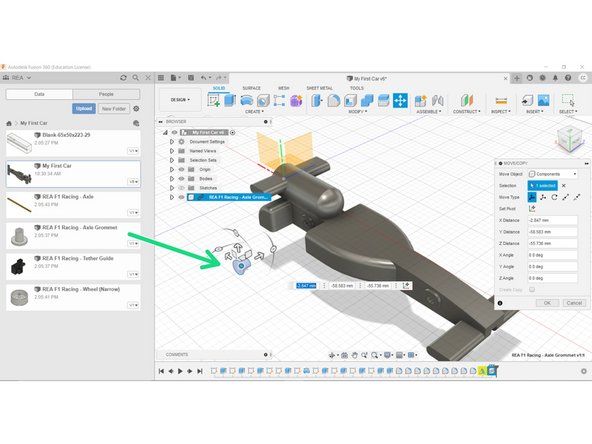
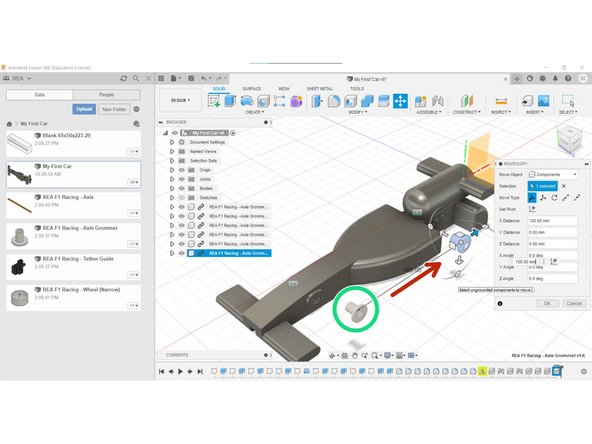
Double-Click on the Axle Grommet, then press CTRL-C then CTRL-V to copy and paste it.
-
Note: The pasted component will be hidden behind the original Axle Grommet.
-
Use the Move Arrows to drag the component approximately into place.
-
-
-
Repeat the process from Step 4, and create a joint between the Axle Grommets and the car body.
-
Note: Successful Joints are illustrated by the green and grey joint symbol.
-
-
-
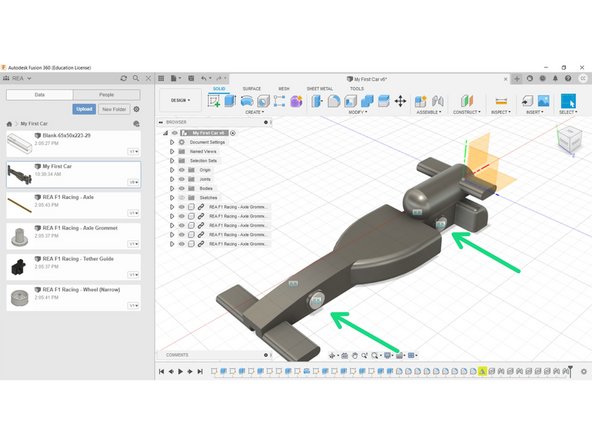
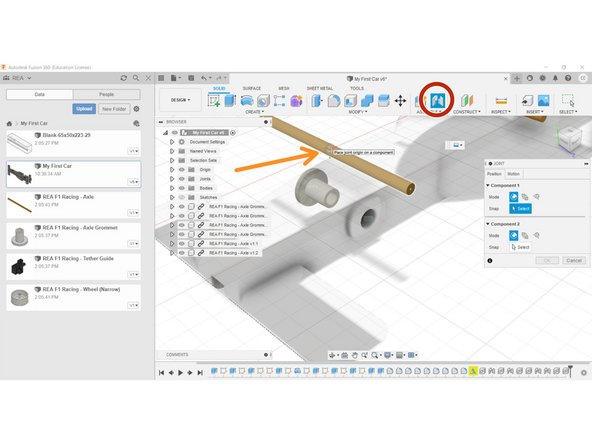
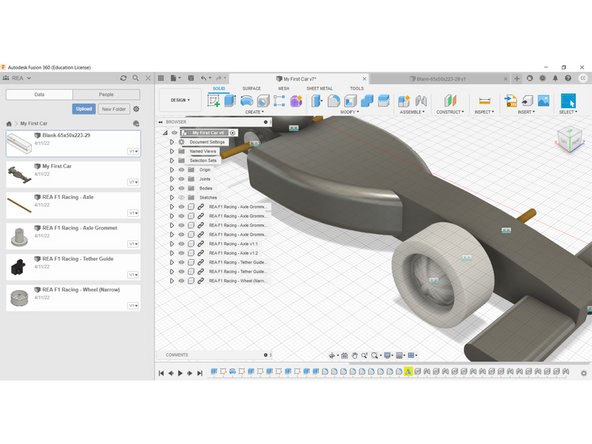
Insert the Axle file into the assembly.
-
Note: You may need to rotate the component to match the orientation of the car body.
-
Copy and paste a second Axle into the assembly.
-
-
-
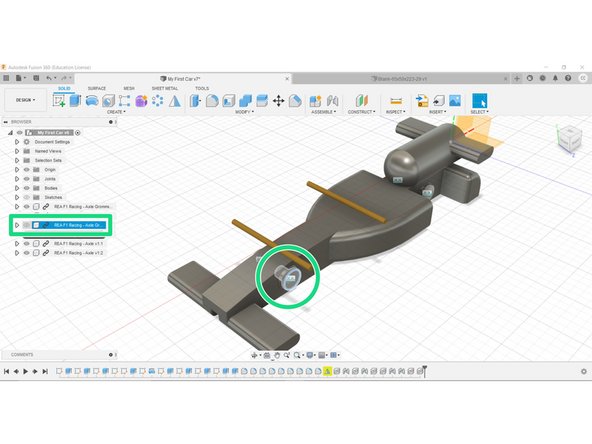
First, Click the Axle Grommet that is obstructing the axle hole. This will highlight the component in the Part Tree.
-
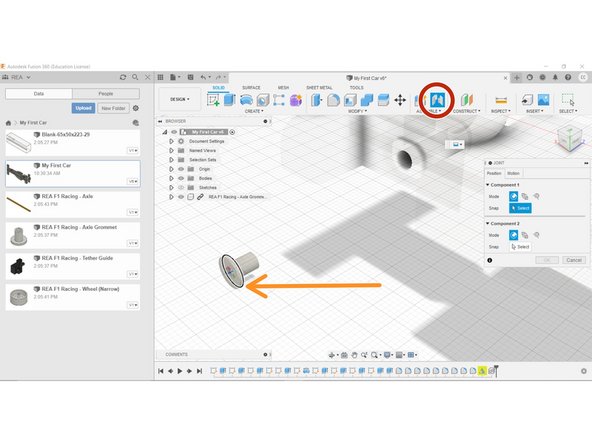
Select the Eye-Shaped icon in the Part Tree to turn off component visibility.
-
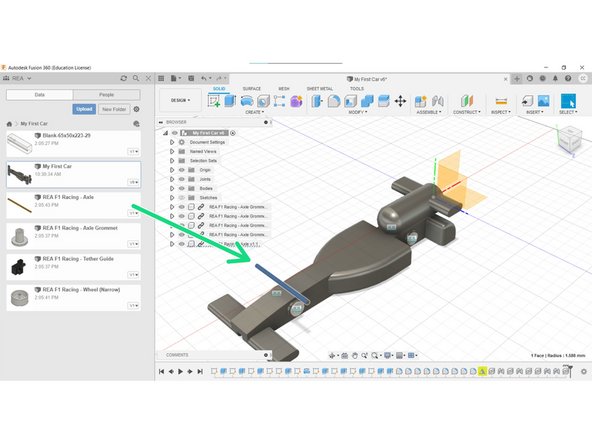
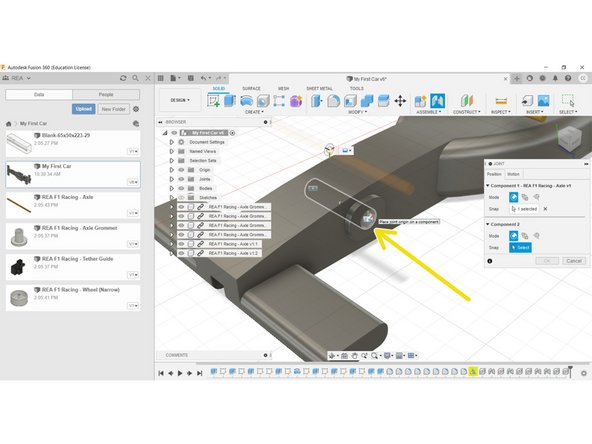
Select the Joint tool from the Assemble Menu.
-
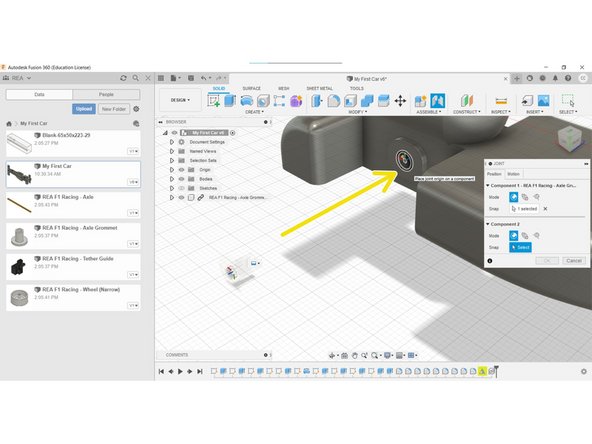
Select the centre (origin) of the Axle.
-
Next, select the cylindrical axle hole.
-
-
-
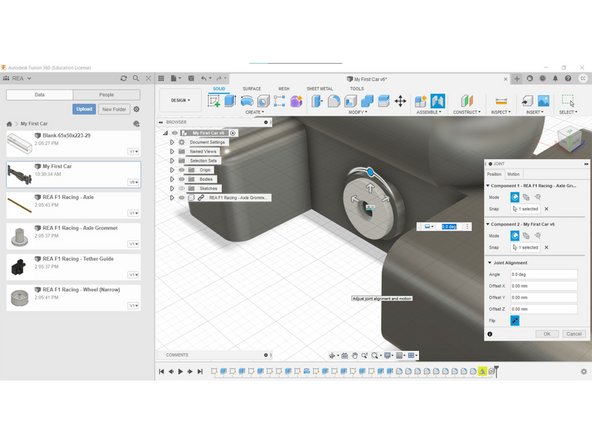
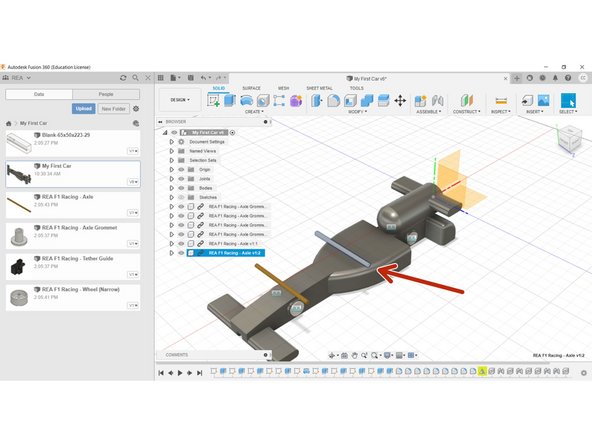
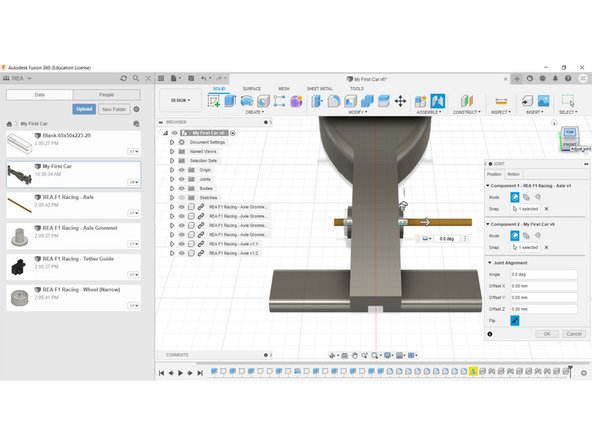
Note how the Axle is not centred within the car body.
-
Change to Front View, and using the Move Arrows, approximately drag the Axle into the centre.
-
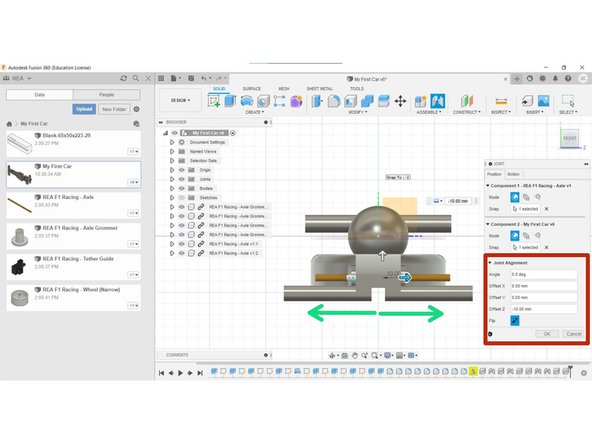
From here make small adjustments using the Joint Alignment Menu until it is centred.
-
In this instance, the correct value is -12mm.
-
Click OK and re-toggle Axle Grommet Visibility.
-
-
-
Repeat the process of Step 10 for to join the Rear Axle to the car.
-
Remember to toggle component visibility where necessary.
-
-
-
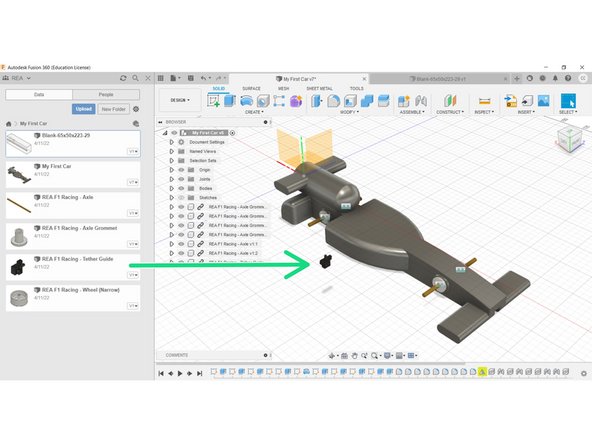
Insert one Tether Guide into the assembly.
-
-
-
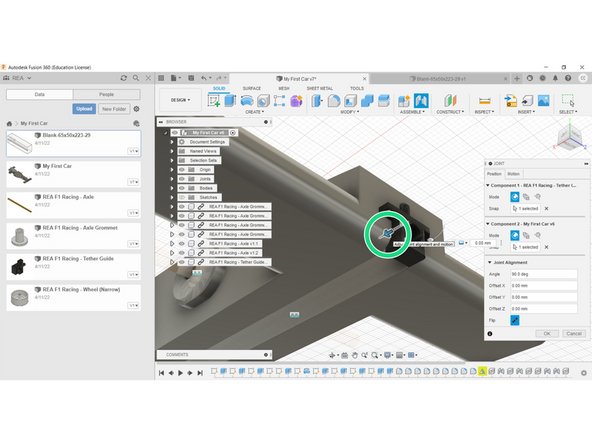
Using the Joint Tool, select the top surface of the Tether Guide.
-
Then select the origin point in the centre of the surface.
-
Next, select the origin point at the front of the car.
-
The Tether Guide will move into position however we still need to make some adjustments so don't click OK yet.
-
-
-
Adjust the position of the Tether Guide using the X-Axis Offset.
-
8mm from the front of the car will provide sufficient material for a strong connection.
-
-
-
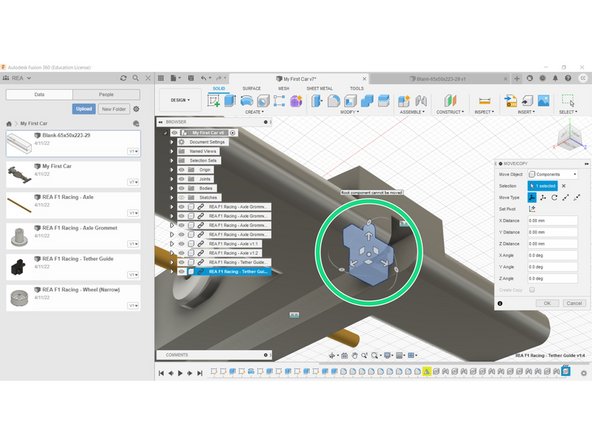
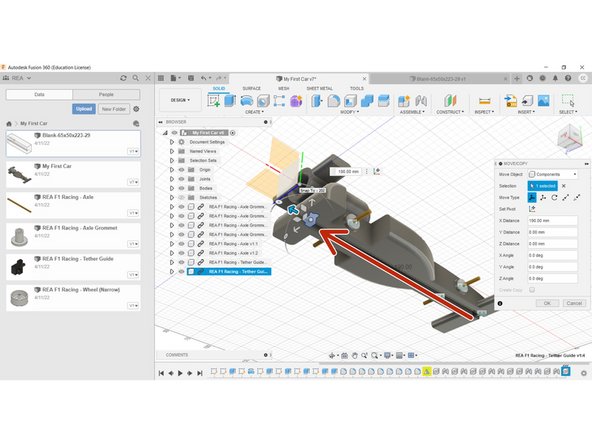
Double-click, and copy and paste a second Tether Guide into the assembly.
-
Use the X-Axis Offset to re-position the Tether Guide at the rear of the car.
-
An offset of 190mm will provide a sound location for the Tether Guide.
-
-
-
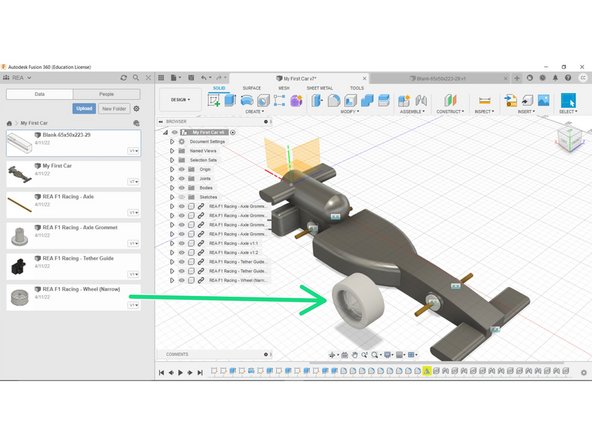
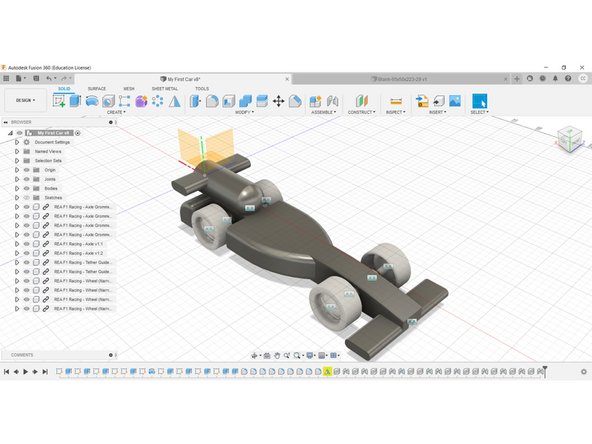
Insert a Wheel into the assembly.
-
Orient viewpoint to look into the inside of the wheel.
-
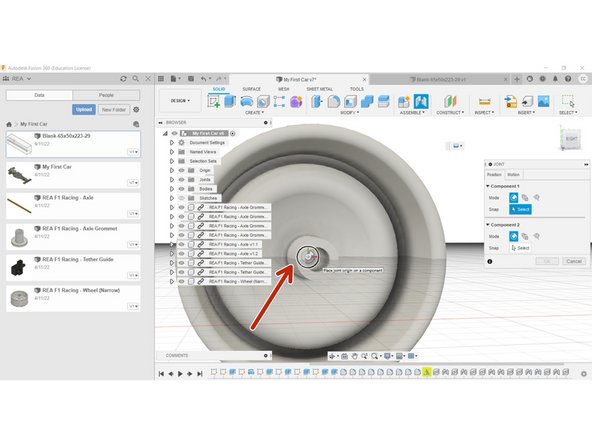
Using the Joint tool, select the innermost surface of the axle sleeve.
-
-
-
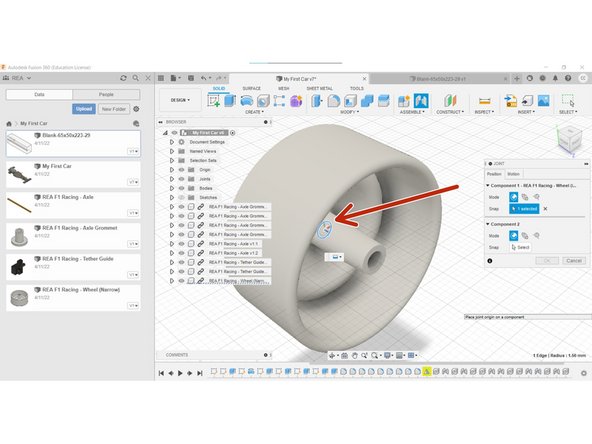
Next, select the outer face of the front axle, and click OK to create the joint.
-
Repeat this process, using the skills the previous steps have taught to join the three other wheels.
-
Congratulations, the assembly is finished!
-