-
-
We need to setup the controller to have the correct inputs to line up with the correct servos etc.
-
Download the attached PDF Manual to help guide you through the initial set up of the controller.
-
-
-
First we need to bind the controller with the Satellite Receiver.
-
Access the Satellite receiver and turn the Submarine on using the power switch on the PPM.
-
Press and hold the button on the satellite receiver for a few senconds until the orange light flashes.
-
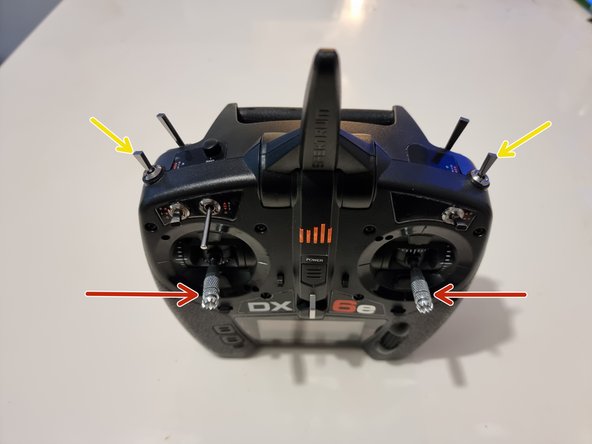
The controller has a failsafe if it loses signal or power that it will revert back to the positions of the joysticks and switches when it was binded. Ensure you have the joysticks set in the centre position.
-
Now on the controller press and hold the bind button down as you turn the controller on.
-
-
-
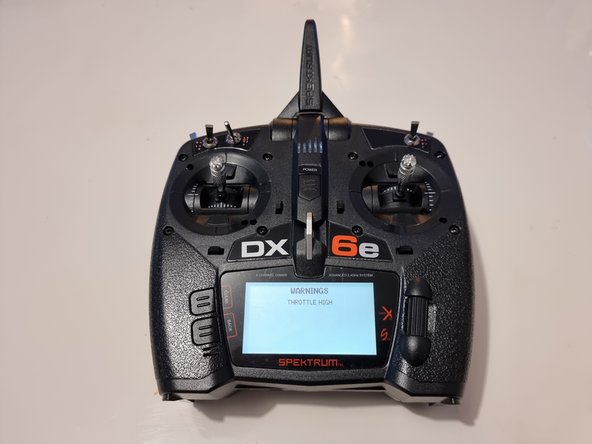
When the controller starts up it will give a warning that the throttle is high. You need to push the throttle joystick down to remove the warning and allow the controller to finish starting up.
-
By default the throttle is the left joystick. If turning it down doesn't remove the warning try the other joystick.
-
-
-
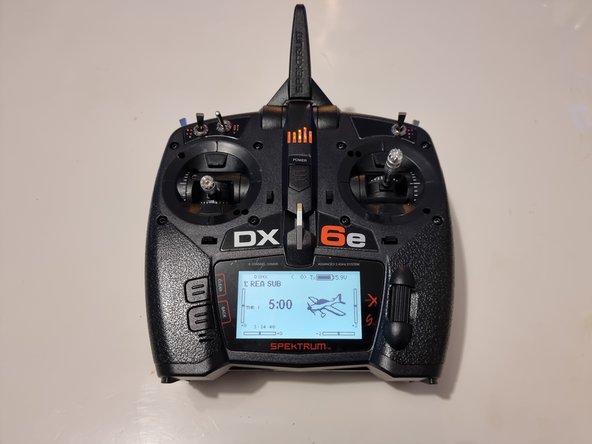
The yaw, pitch and thrust are all controlled using the 2 joysticks.
-
The ballast tanks are controlled using switches B and G on top of the controller.
-
-
-
We now need to setup the channels to match our setup.
-
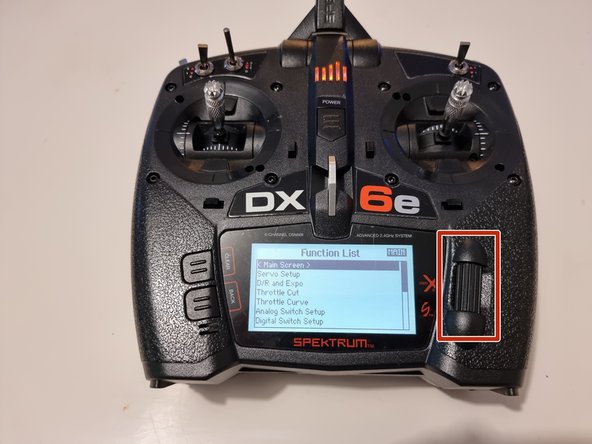
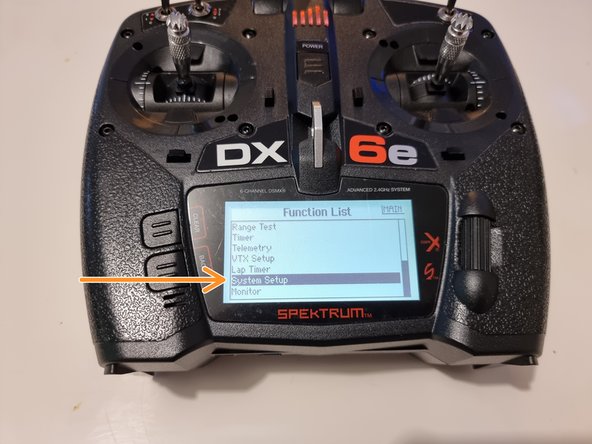
Press the scroll/roller button on the right side of the screen to enter the menu.
-
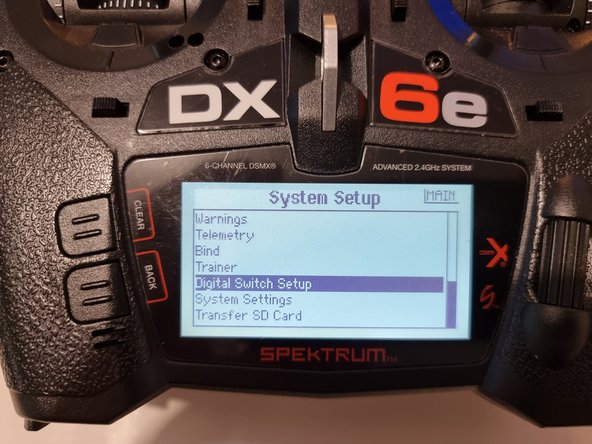
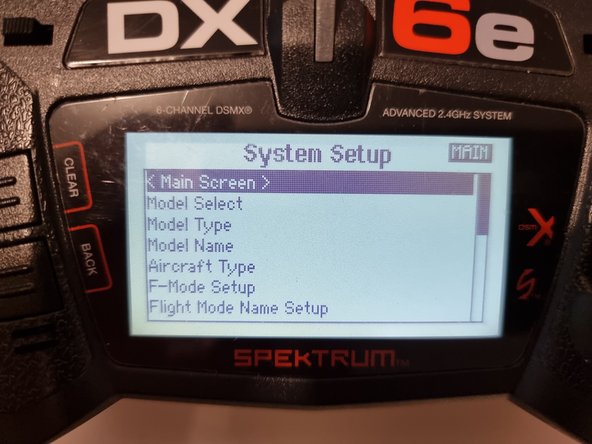
Scroll down until you get to System Setup and click into it.
-
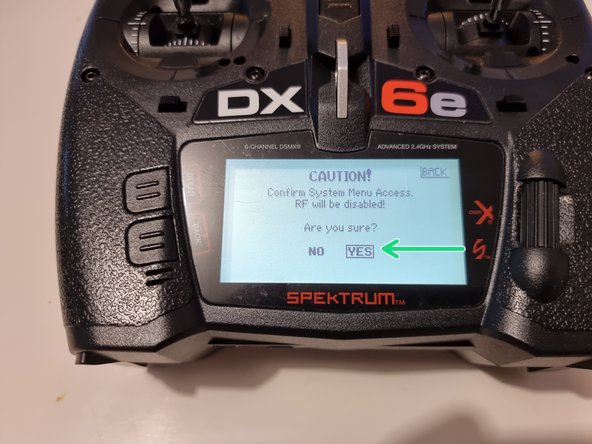
It will give you a caution message that the communication between the controller and receiver will be disconnected. Select yes to continue.
-
-
-
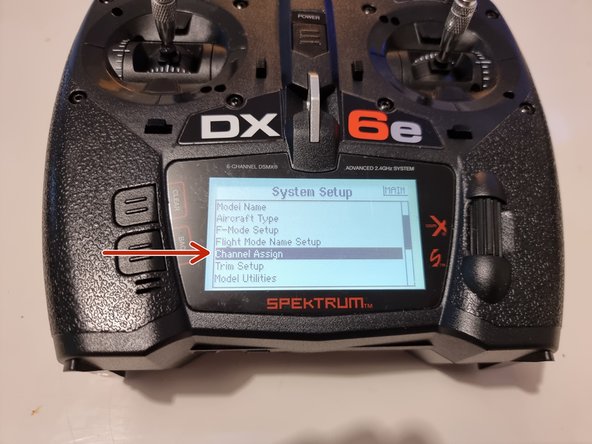
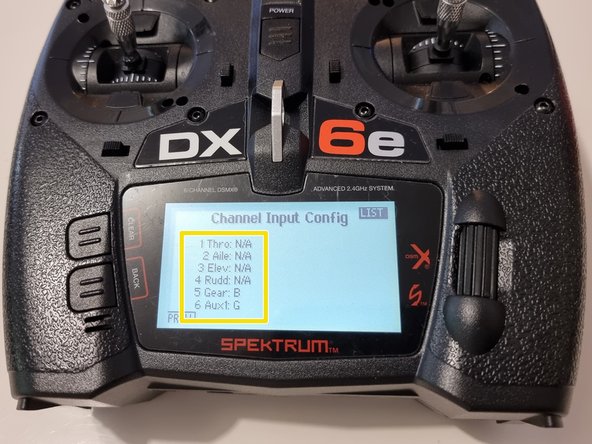
Scroll down to find channel assign and select it
-
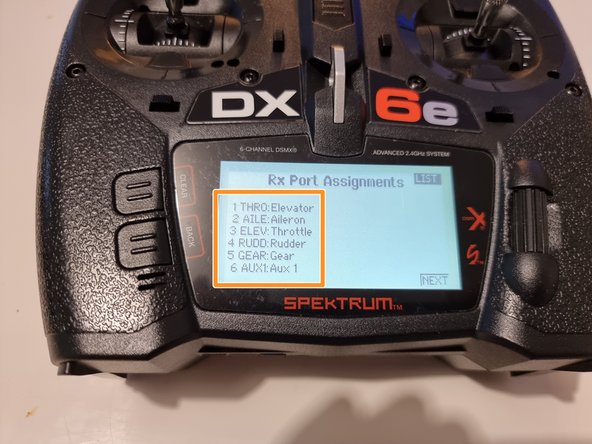
Set your controller to match this setup. Scroll to one that needs changing select it and it will allow you to scroll through the options to find the one it needs changing to.
-
Once you have them all set correctly select next at the bottom right corner of the screen.
-
Set your controller to match the setup shown ensuring you have switches B and G selected for the last 2 channels.
-
You can now select list at the top right of the screen to head back to the menu.
-
-
-
In the system setup menu find the digital switch setup and select it.
-
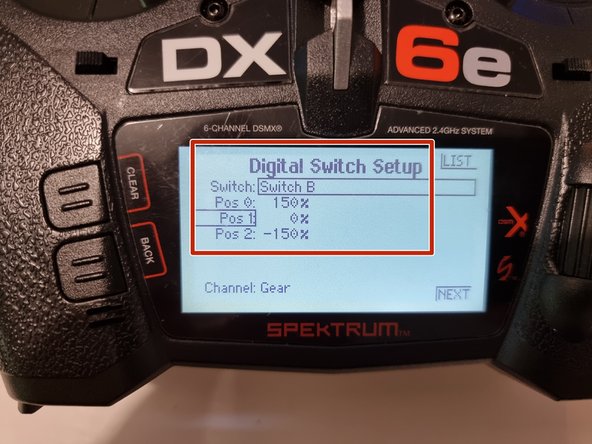
Cycle through the switches to find Switch B. Set Pos 0 to 150%, set Pos 1 to 0% and set Pos 2 to -150%.
-
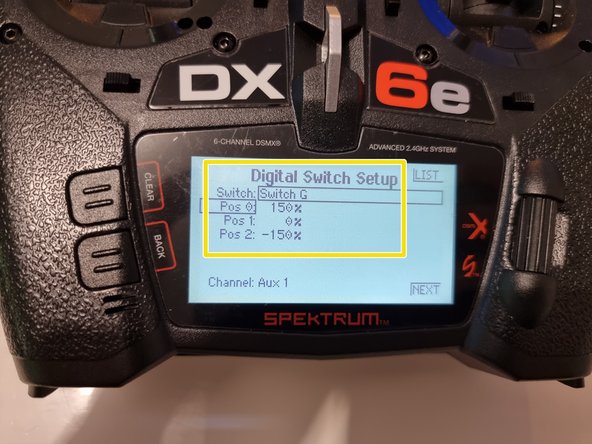
Cycle through to find Switch G and set the positions the same as Switch B.
-
-
-
You can now press the Main Screen option to get back into the main menu.
-
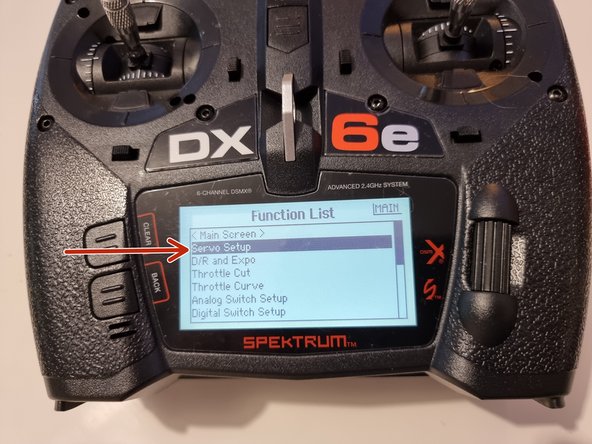
Scroll down and select Servo Setup.
-
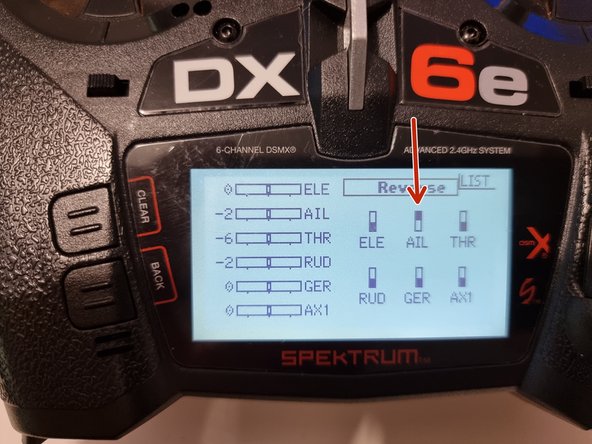
We can now adjust the travel of all the channels. ELE is the thruster and we find that turning it down to 30% forward and 30% reverse is still plenty of power.
-
For AIL THR and RUD they are the control surfaces and you can adjust the travel of these to suit your requirements. You find that sometimes the servo moves more than another so you can adjust the travel to ensure they have a similar amount of travel.
-
For the GER and AX1 these are the channels for the ballast tank pumps you want these set to 150% to allow the pumps to run as fast as possible to shorten the time it takes to fill and empty the bladders.
-
-
-
Scroll to travel at the top and click and scroll until you get to reverse.
-
You can reverse the travel/direction of the servos etc.
-
Run through all the movements on the Submarine to check for any channels that need to be reversed. We had to reverse the AIL channel.
-
-
-
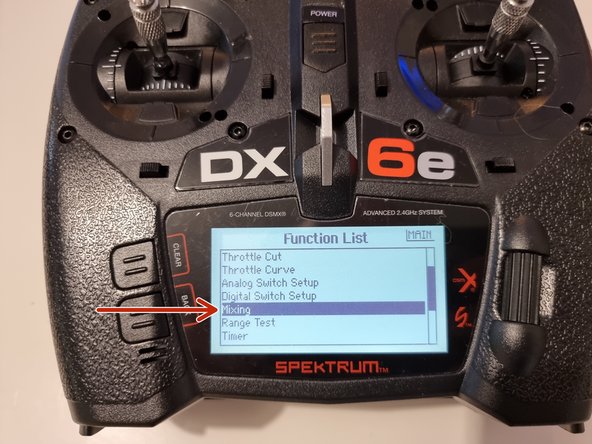
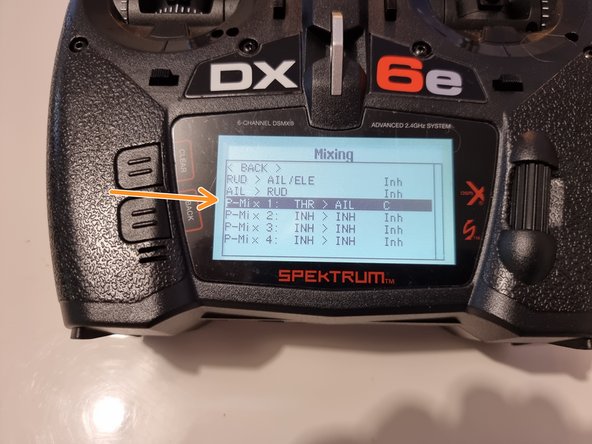
Head back to the function list and scroll down to mixing and select it.
-
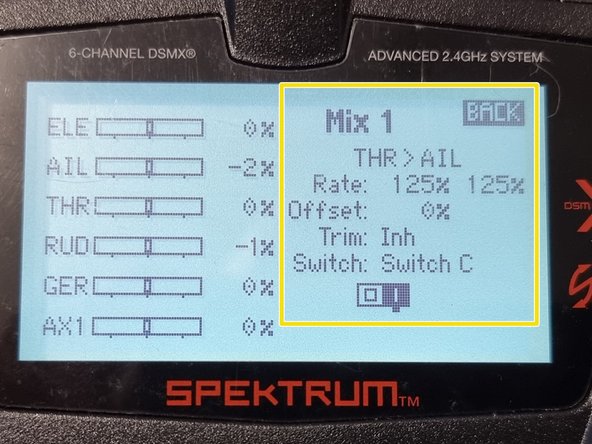
In the mixing page scroll down to P-Mix 1 and select it
-
Match the settings to the ones shown here.
-
This mixes the fore and aft pitch control surfaces. This means that when we move the joystick to control one of them they both move. This is why we reversed one of the channels in the previous step so that the control surfaces rotate in opposite directions.
-
-
-
You can now exit the menu and ensure that everything is working as it should be. If not you can go back and modify the channels if needed.
-